Bodor Tech Blog
Trending and helpful laser knowledge for your success
Share


How to Laser Cut Stainless Steel Effectively?
Manufacturers in various industries now apply laser cutting to process stainless steel, such as metal furniture, lighting, automobile, kitchenware, and more.
But not every manufacturer knows how to make the best of it.
In fact, many cutting defects often occur when cutting stainless steel. For instance, the processed sheet has small regular drip-shape burrs or long irregular burrs on one side. Sometimes the cut edges become yellow affecting product appearance.
If you are struggling with these problems, well, don’t worry.
This blog is exactly what you need! You will learn helpful information here about how to achieve high-quality stainless steel cuts.
Set up the laser cutting machine
Before powering up the machine, confirm that each device’s electricity supply line connection meets the machine’s requirements, and the wiring is stable; the machine is intact and nothing blocks each movement axis.
· Clean the protective lens
Clean the protective lens, ensuring no water, oil, residue, or black and yellow stains on them. Notice that sometimes the protective lens can be fogged due to cold weather or auxiliary gas.
· Choose the right nozzle
Next, you can choose the right nozzle for your processing needs with the help of the following table:
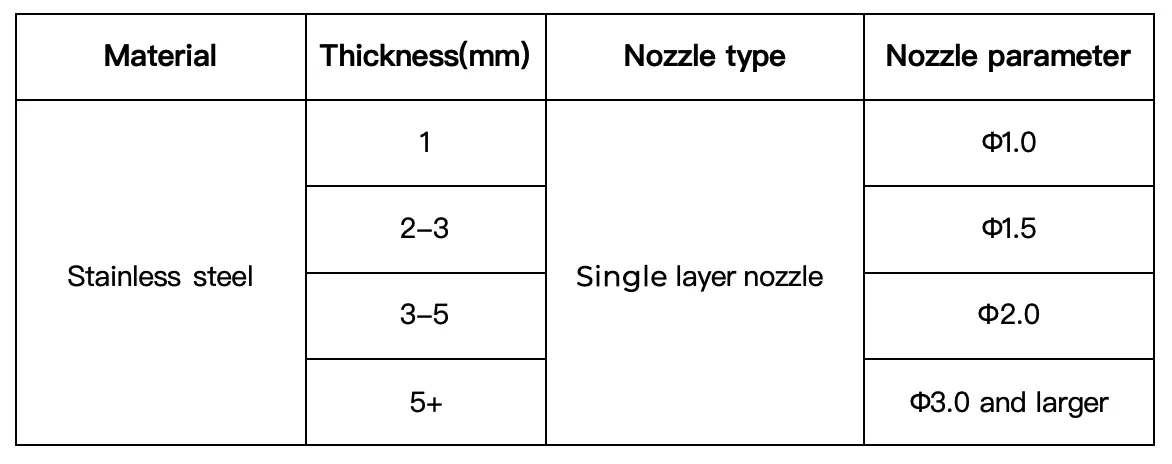
In addition to the nozzle type and size, its condition also plays a crucial part in the processing.
You should put the nozzle carefully without damaging it and clean the residue on the nozzle regularly. When the nozzle experiences deformation or accumulates too much residue, it will directly affect the cut quality.
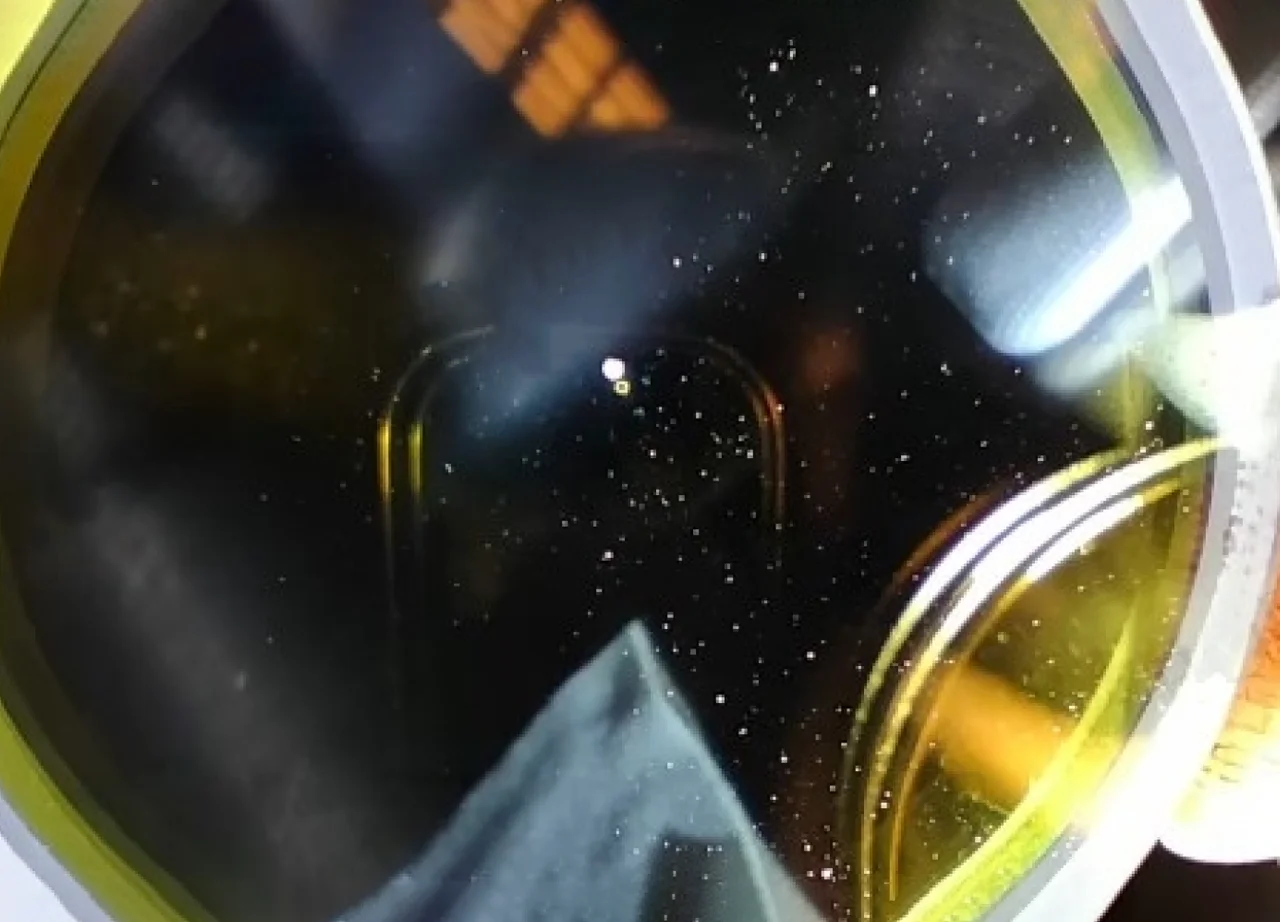
· Observe the pilot light status
Ensure that the pilot light is intact and round, and there are no black spots in it.

If there are black spots in the pilot light, check the conditions of the focusing protective lens first. Take out the focusing protective lens, and if black spots still exist, it means that the internal lens or collimating protective lens of the laser head is damaged. You need to contact a professional technician to fix this problem.
· Make sure the laser light is coaxial with the nozzle
1. Operate on the cutting software to move the beam and laser head to the proper position;
2. Apply the scotch tape to the end face of the nozzle with your thumb as in the pictures below.
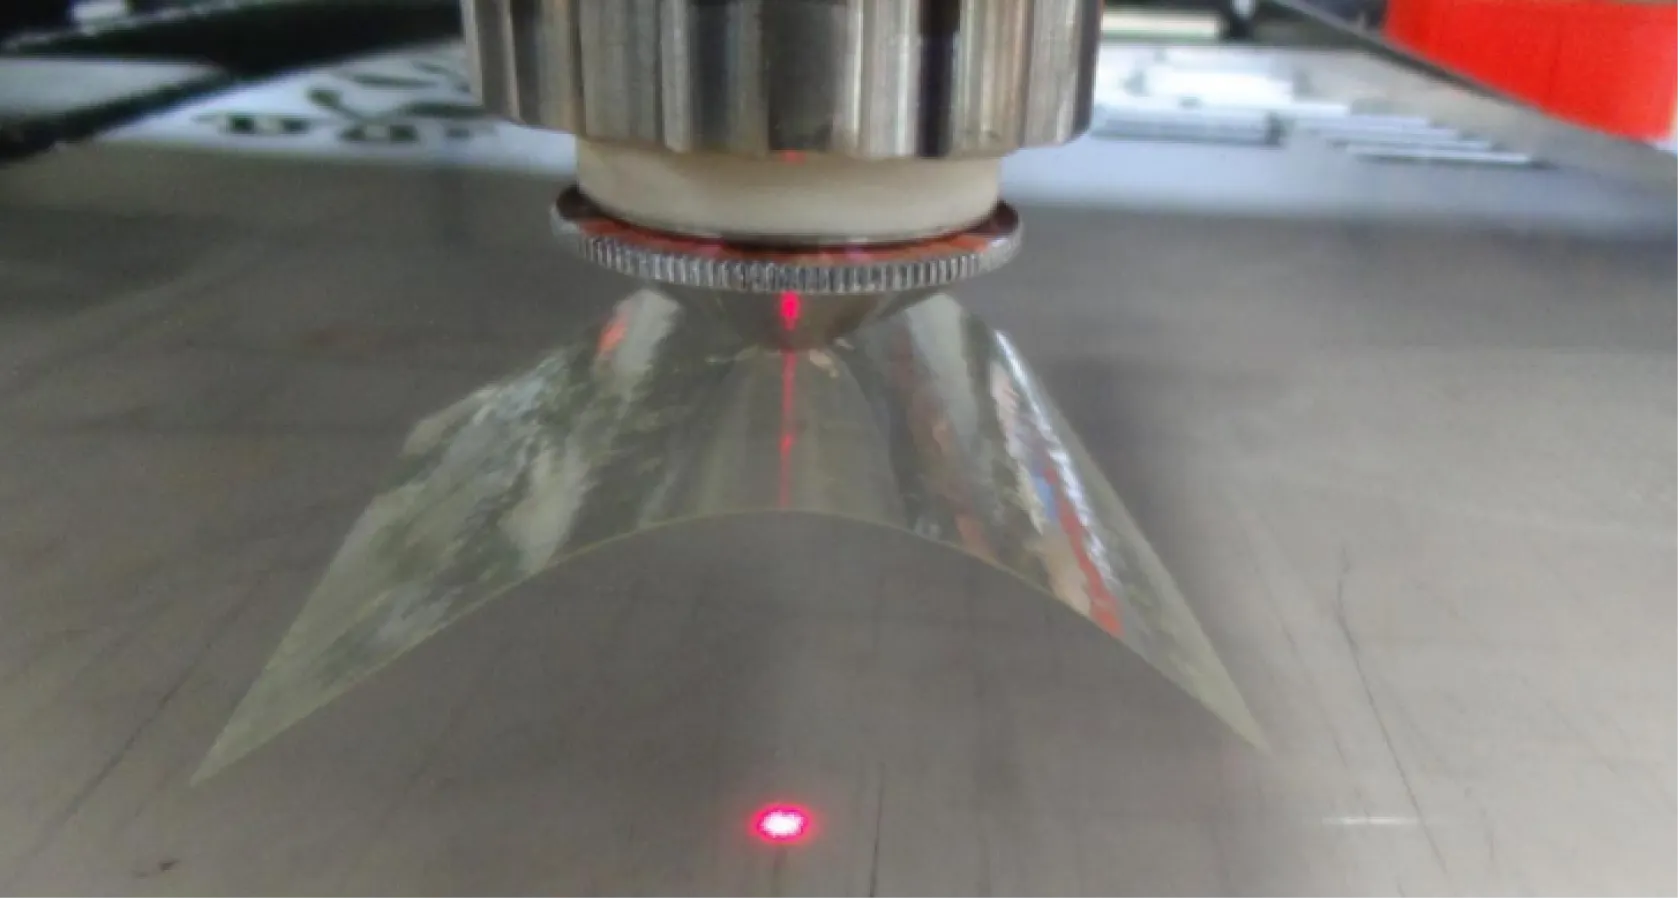
3. Set the appropriate power, usually around 80-100W, in the software, and click the “Laser” button. Then there will be a “⊙” appearing on the tape, and take off the tape. Pay attention not to change the tape’s position when you do that. If the light spot is not in the nozzle’s center, you need to adjust the knob on the top of the laser head to make the light spot across the nozzle’s center. Repeat these steps until the hole made by the laser on the tape is coaxial with the nozzle’s center.
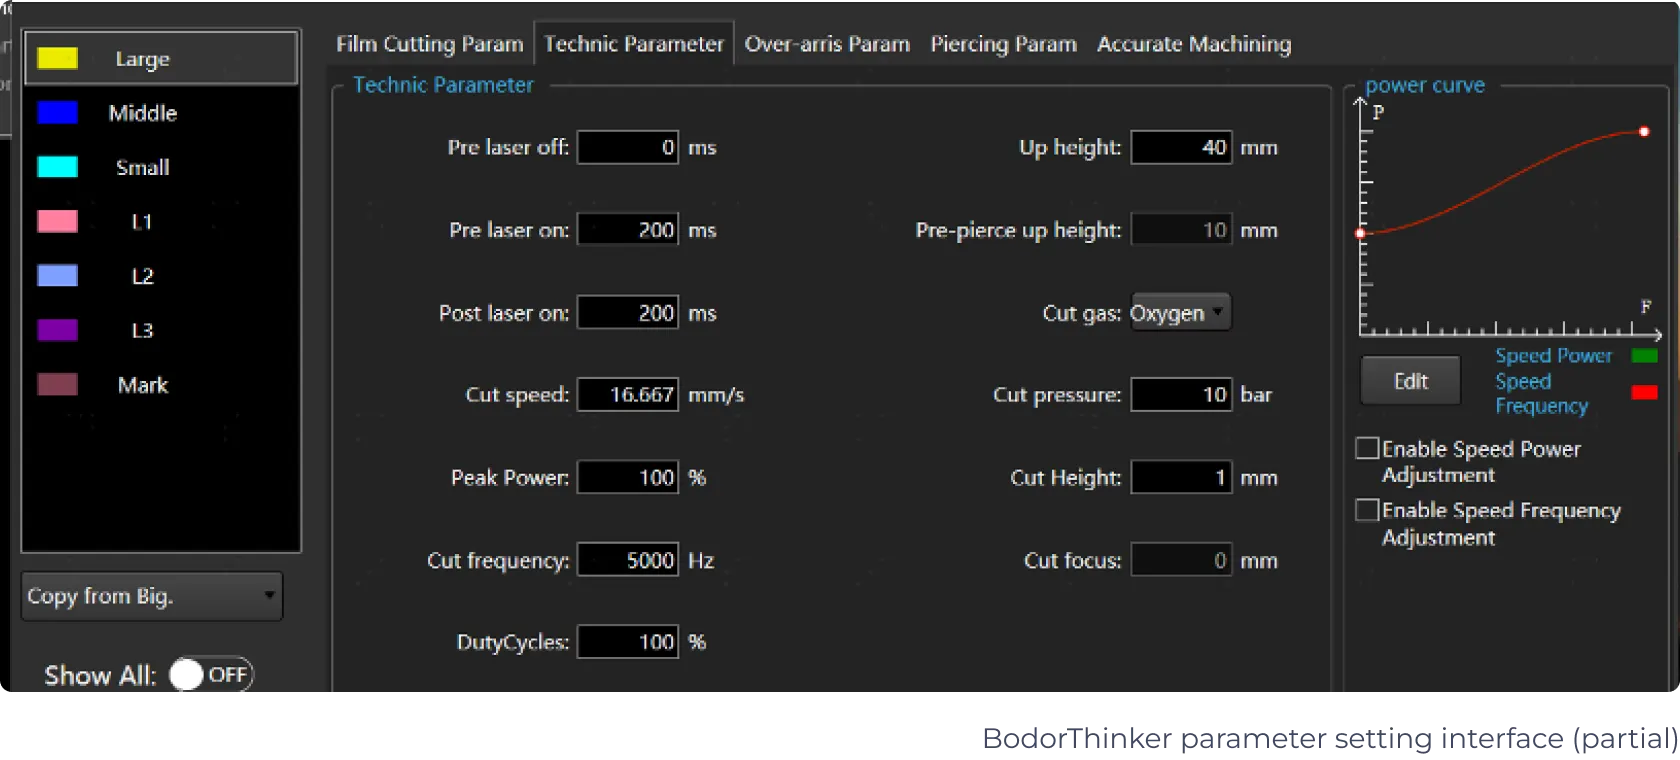
Input suitable cutting parameters
Look through the parameter setting interface to make sure whether the cutting parameters match the cutting needs. If not, adjust or import the adapted parameters in time.
· Identify inappropriate cut speed
After inputting the cut speed, check the cut sparks to keep a stable speed because the proper speed creates a smooth edge without slags.
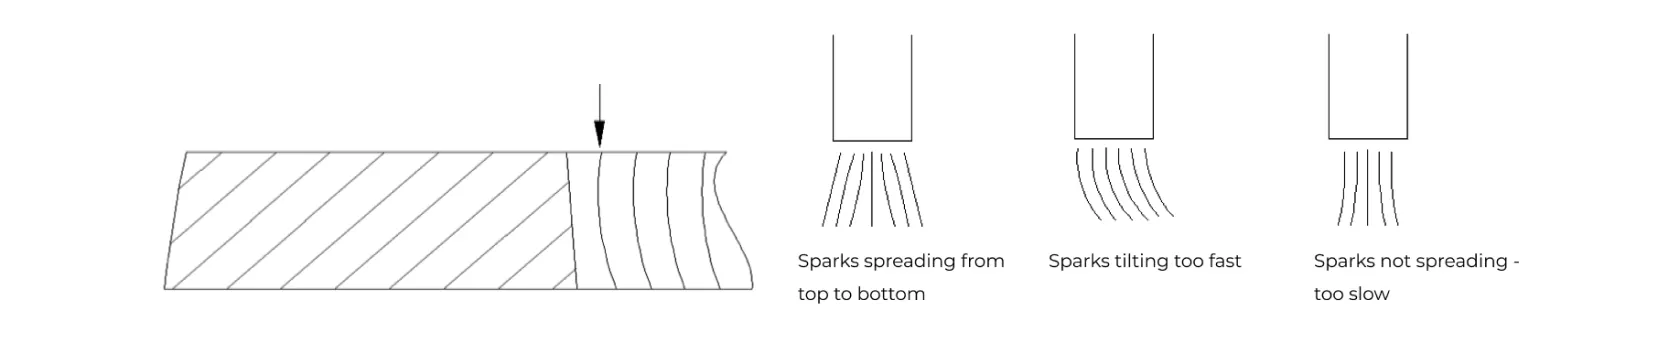
When the sparks spread from top to bottom, it means that the speed is just right. Tilting sparks indicate that the speed is too fast while condensed sparks suggest a lower speed.
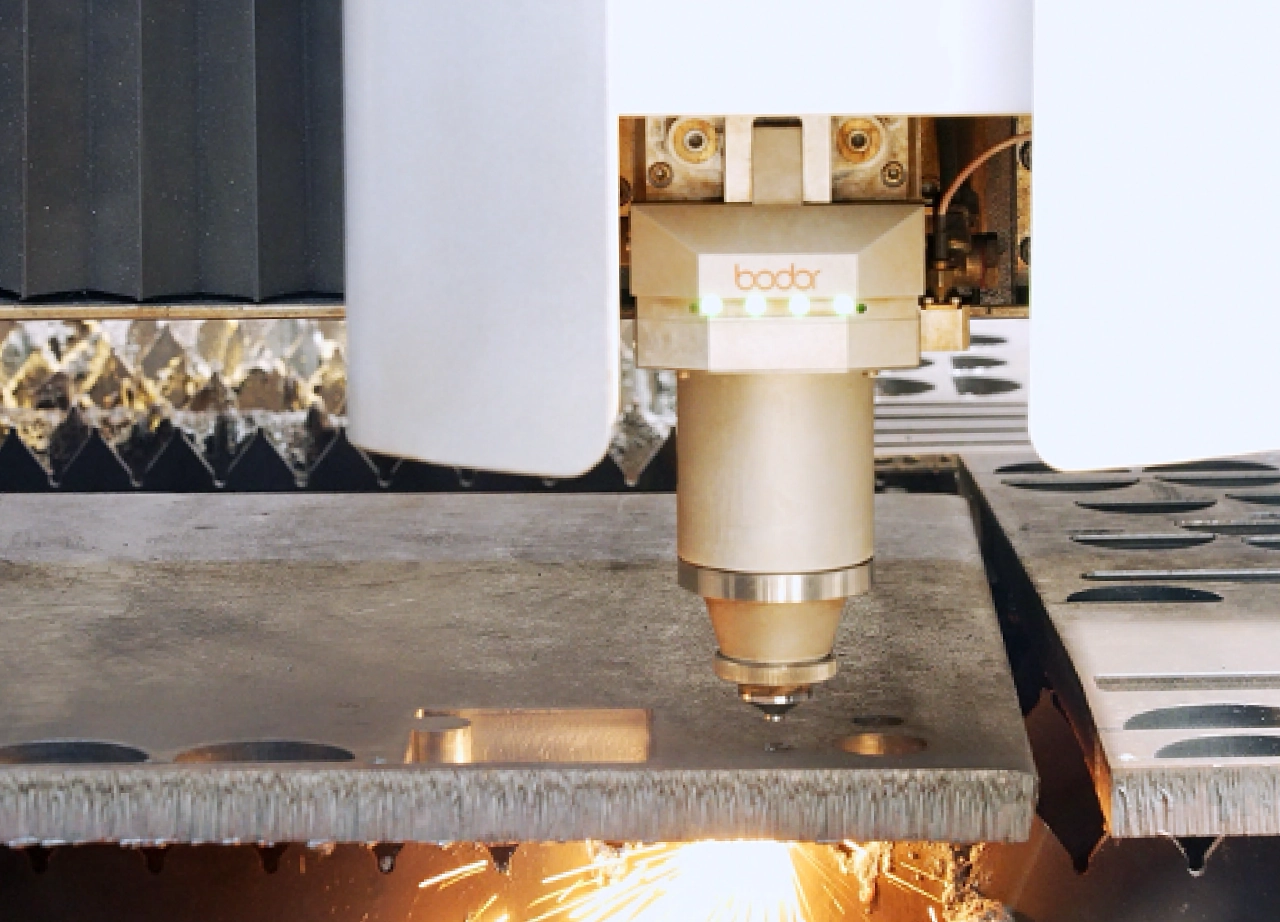
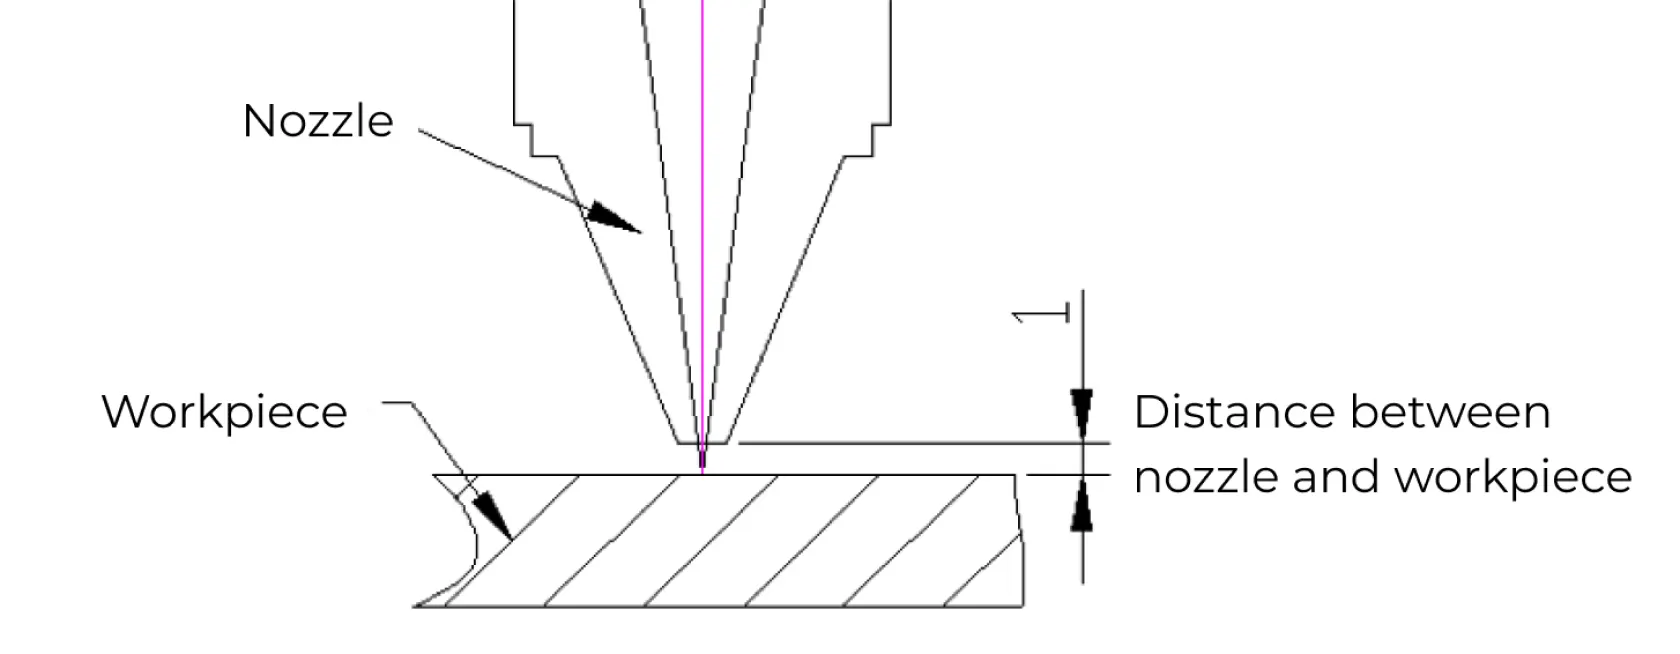
· Adjust the cut height to a proper position
Set the distance between the nozzle and workpiece around 0.5mm to 1.5mm.
This distance is important because if it’s too short, the nozzle and workpiece might collide and cause damage; if it’s too long, the cut gas will spread out and leave more residue on the bottom surface which affects cut quality.
· Locate the precise focus
You can skip this step if you are using Bodor’s laser cutting machine because it adjusts the focus automatically, ensuring a stable focus.
Otherwise, you should measure the actual zero focus as a base to test and analyze the cutting process parameters, and stainless steel cutting usually adopts a negative focus, which is under the surface of the workpiece.
· Use the appropriate laser power
Adjust the laser power based on the material and thickness of the workpiece. Too large or too small power will compromise the cut section.
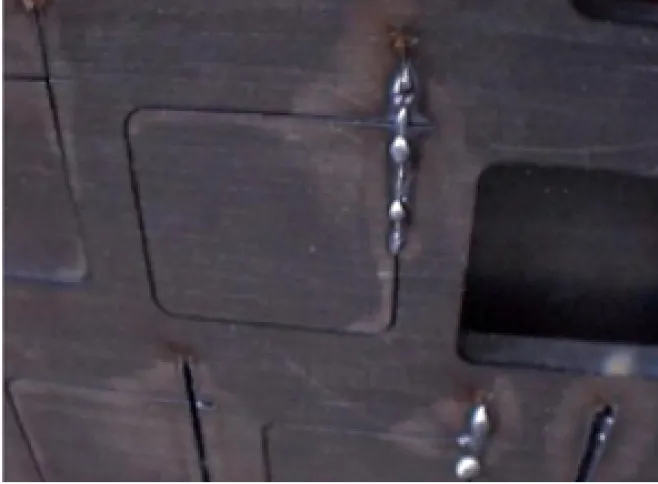
The power is too small to cut through the plate.
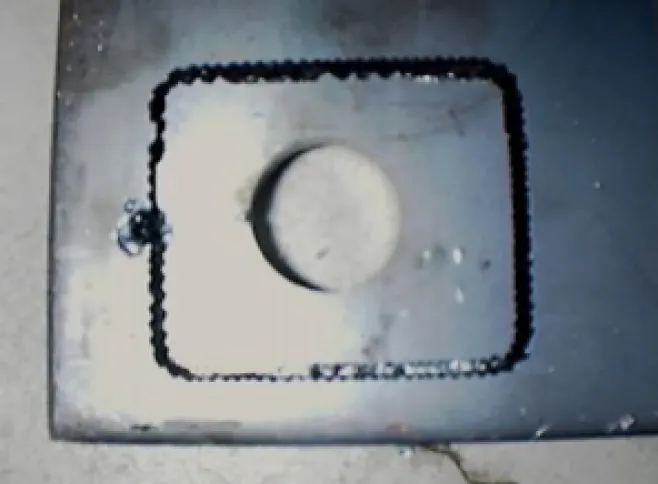
The power is too large so that melts the cut section and creates a wide kerf.
Note: These two samples are carbon steel plates, and stainless steel plates exhibit the same effects if the laser power is too small or too large.
· Find the optimal cut frequency range (for thicker stainless steel sheets)
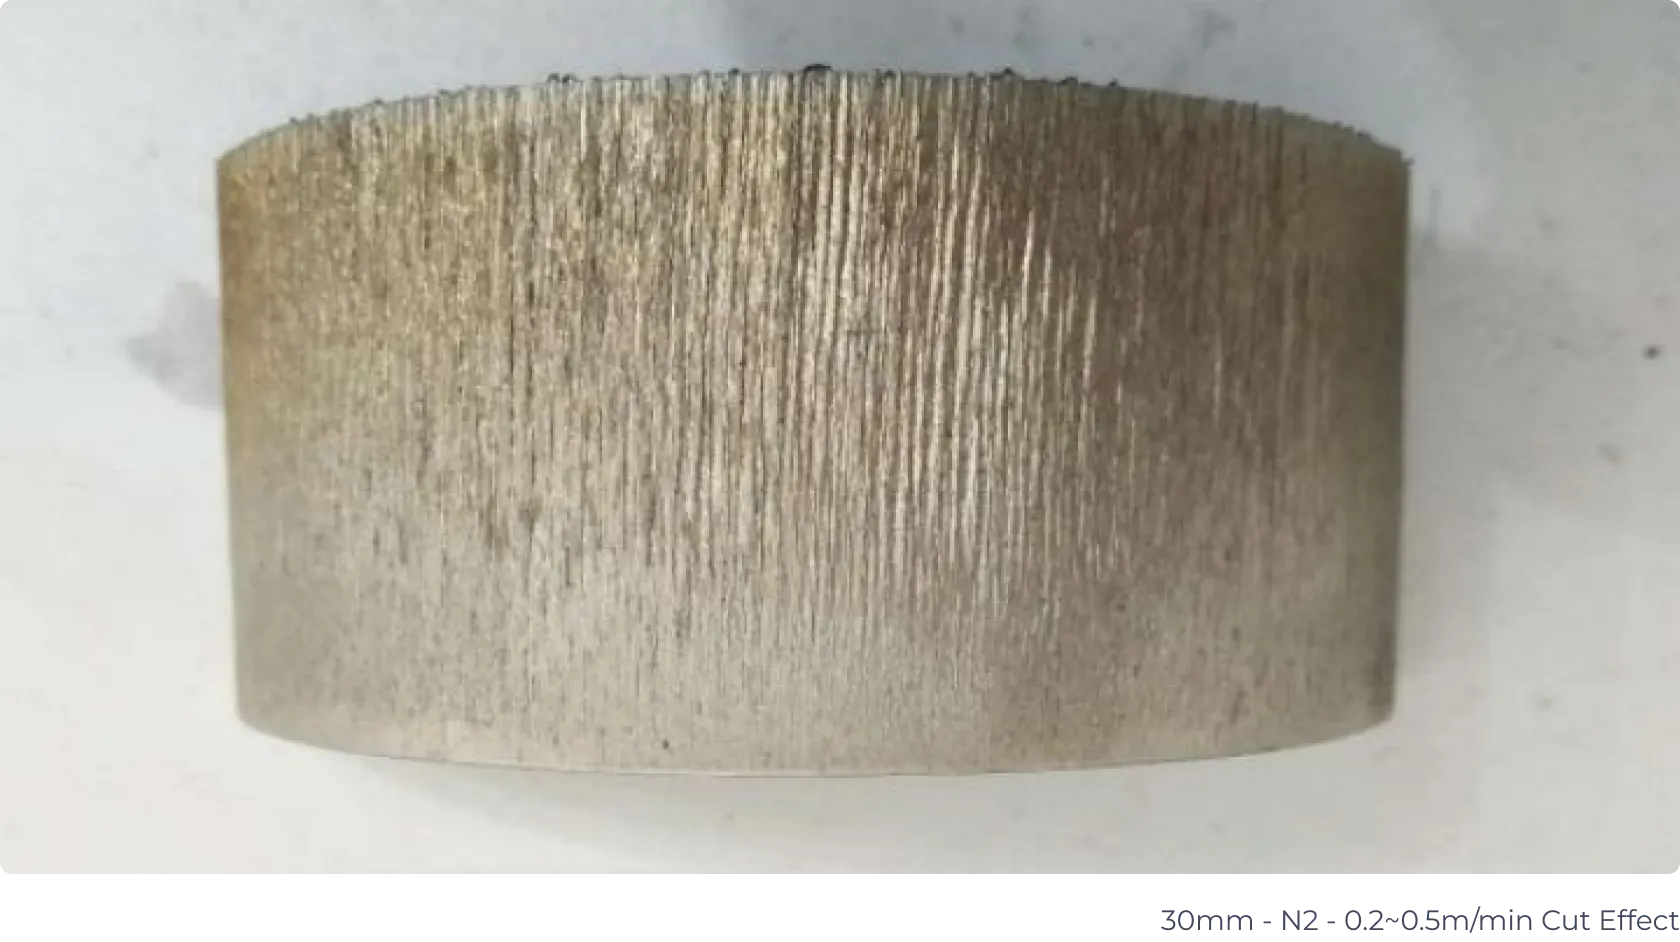
Change the cut frequency within the range of 5000Hz to 200Hz and observe the cut section, finding the optimal frequency range. To achieve the best cut section quality, you need to make sure that the pulse frequency matches the single pulse energy. As the laser frequency decreases, the quality of the cut section becomes smoother and the layering condition improves.
· Use the appropriate auxiliary gas
Generally, we would recommend you use nitrogen with a purity of 99.995% for cutting stainless steel because it does not generate oxidation on the cut edge, omitting post-processing.
If your business requires to process thicker stainless steel sheets, you can use oxygen with a purity of 99.999% to cut effectively.
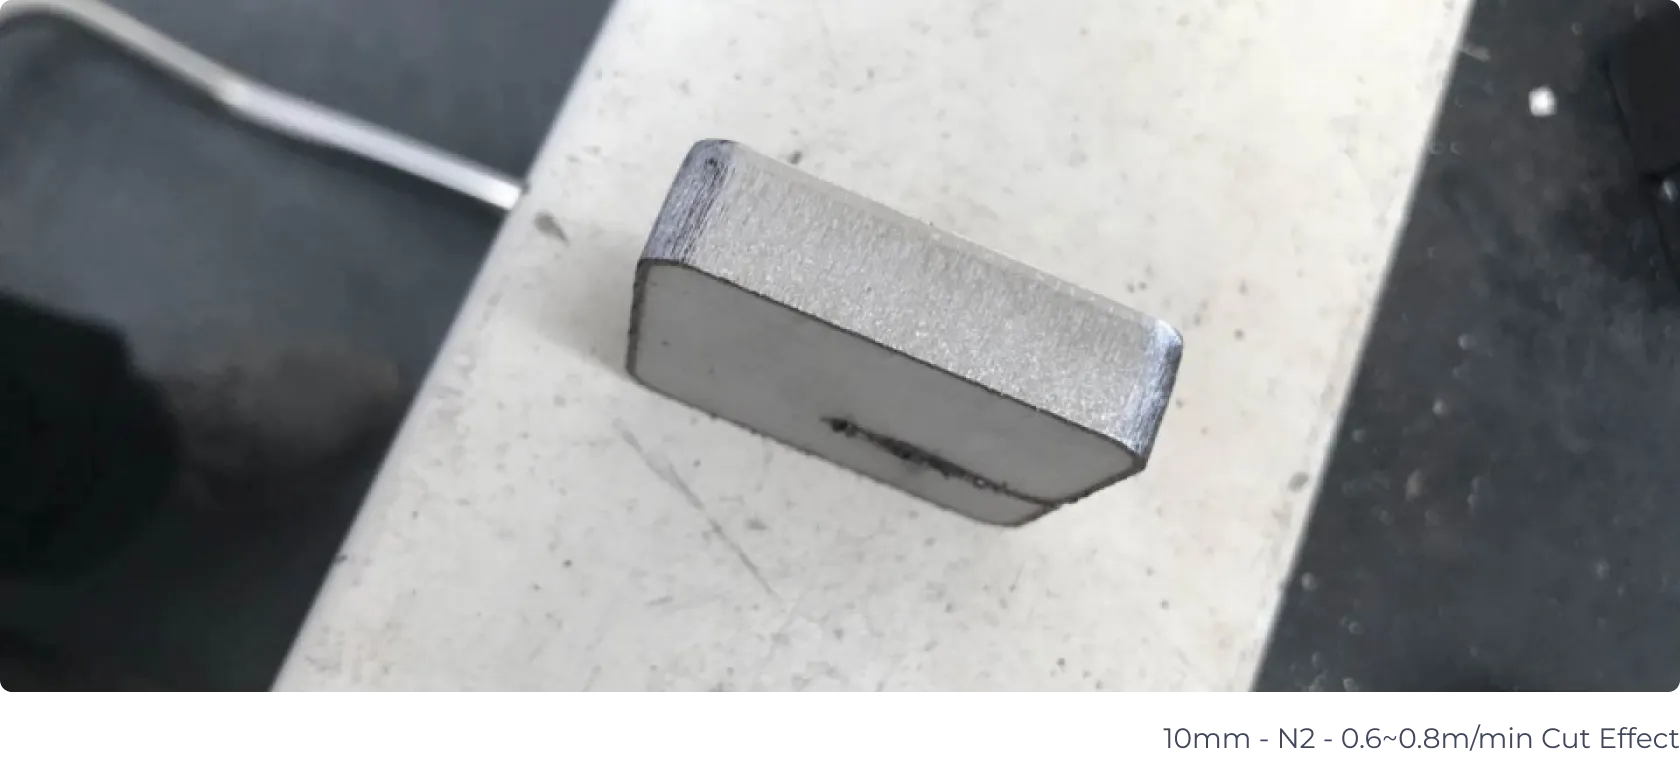
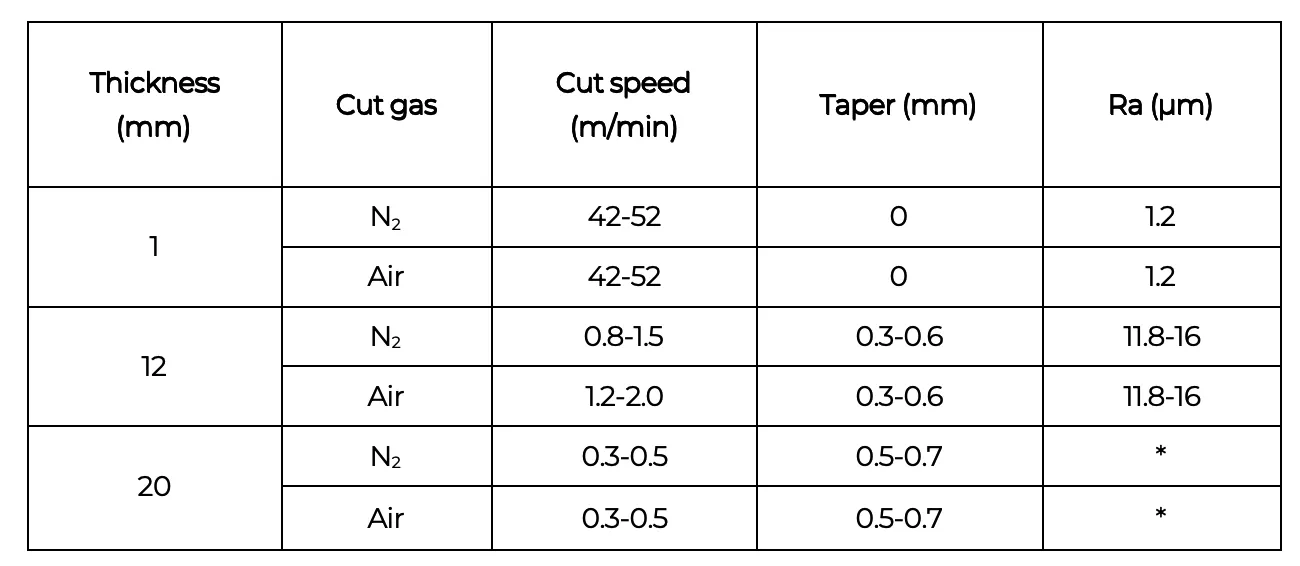
· Recommended stainless steel cutting parameters for different power
For 3kW laser power:
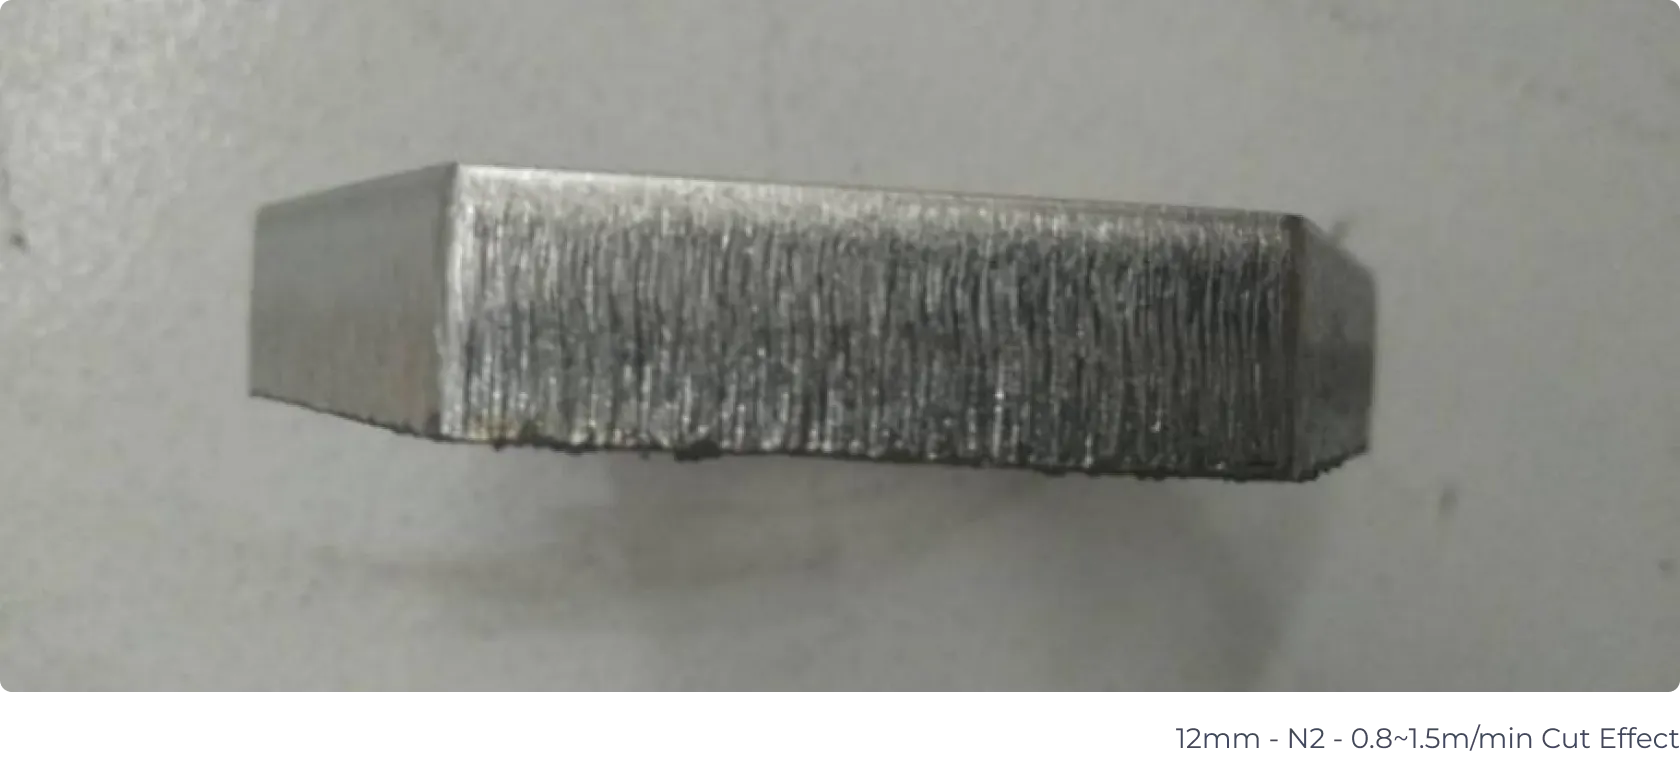
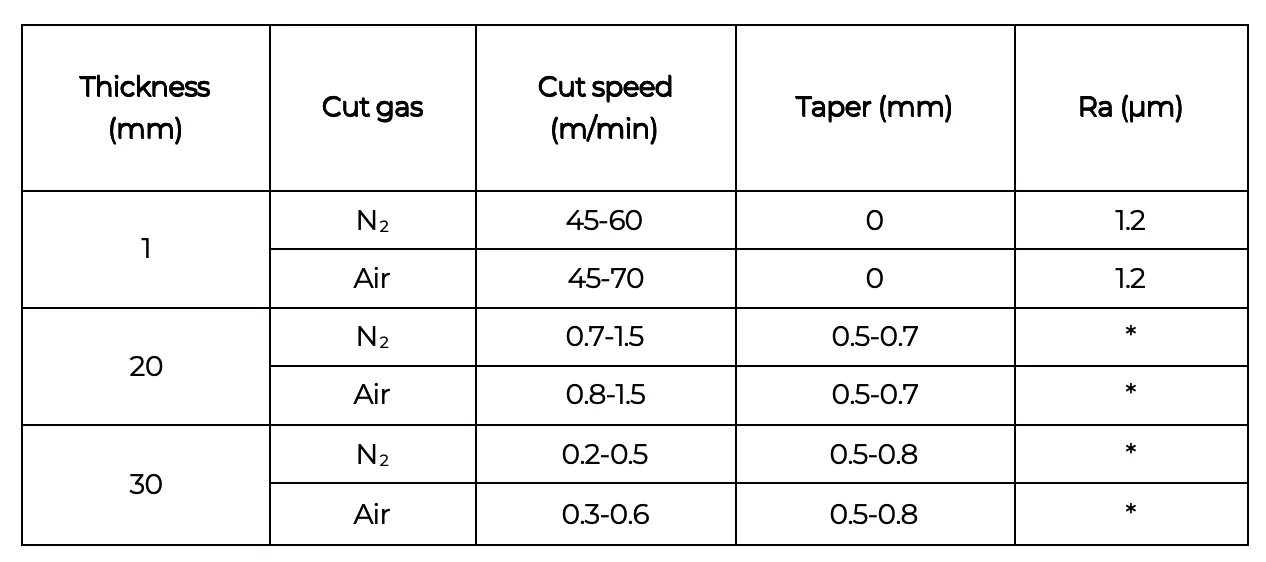
For 6kW laser power:
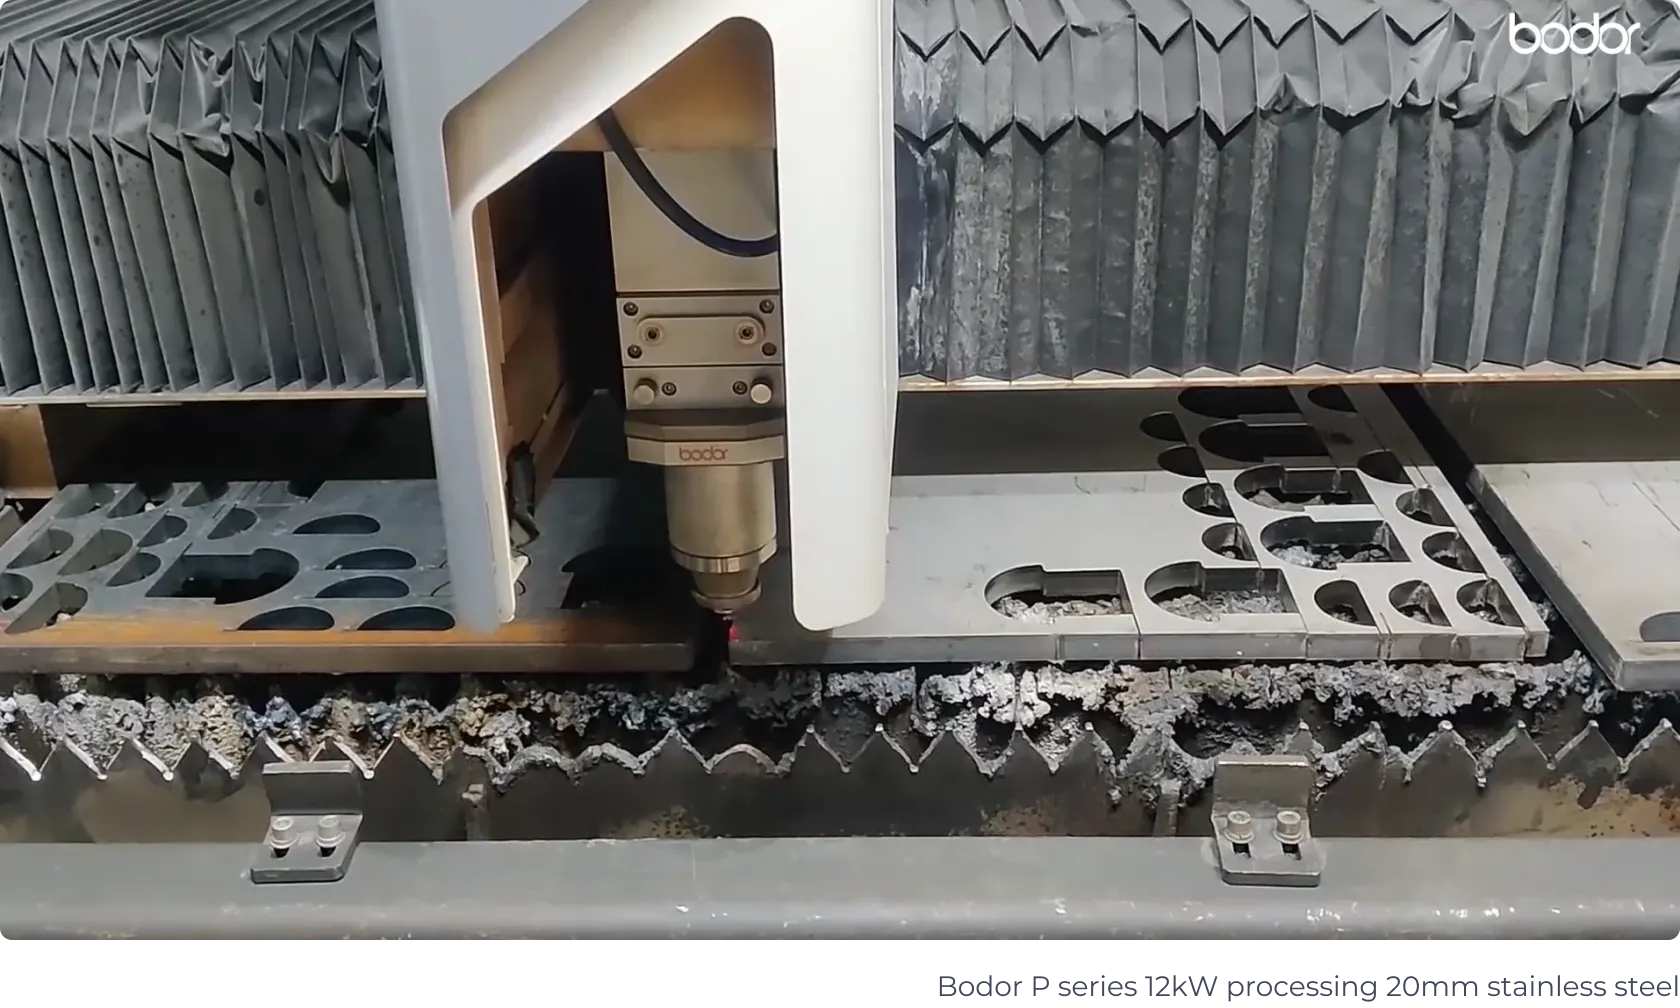
For 12kW laser power:
Common stainless steel laser cutting defects and solutions
Now you are well-prepared with the information to process high-quality products with stainless steel. To help you more practically, there is a chart that summarizes common problems you may encounter during cutting and solutions to conquer them.
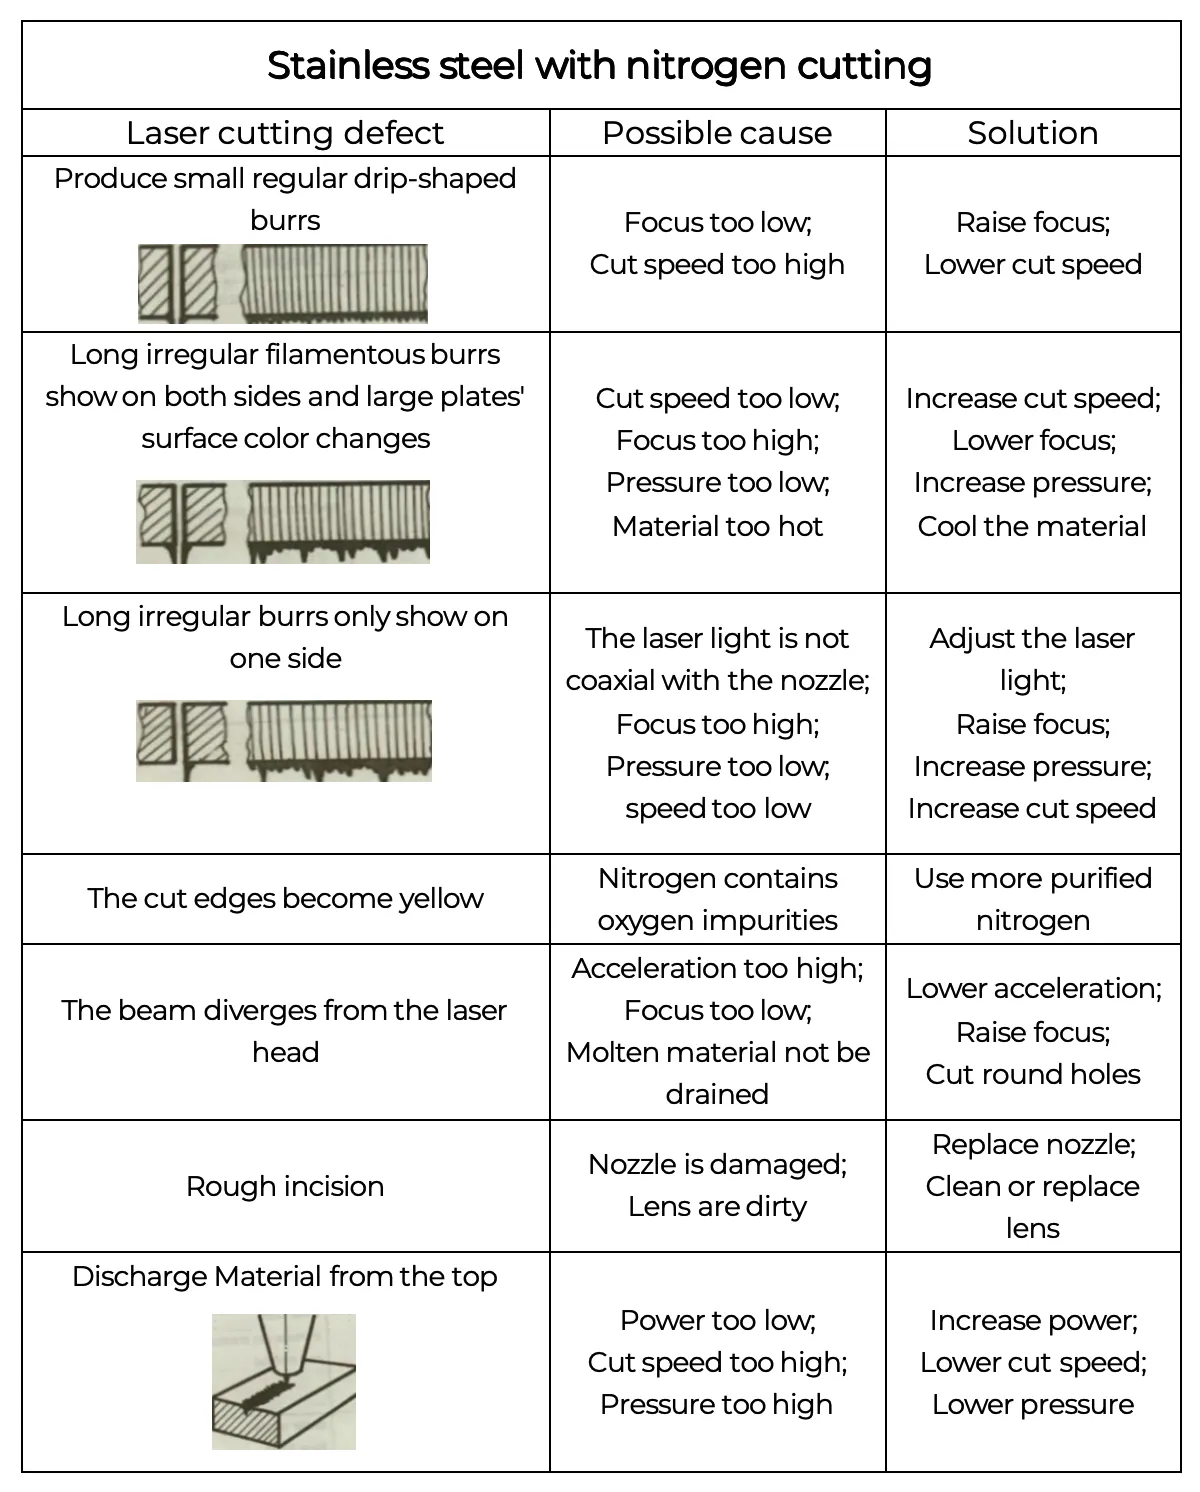
If this table does not cover your problems when processing stainless steel and you have no clue about how to deal with them, Bodor’s 7/24 Online Service Team will help you as soon as possible. Simply send us a message on the service page, and our skilled technicians will reach out to you to solve your problems promptly and wholeheartedly.
Efficient stainless steel laser cutting machine
Following the right procedure is important, but using the RIGHT TOOL is more significant as high-performance laser cutting machines can yield twice the result with half the effort.
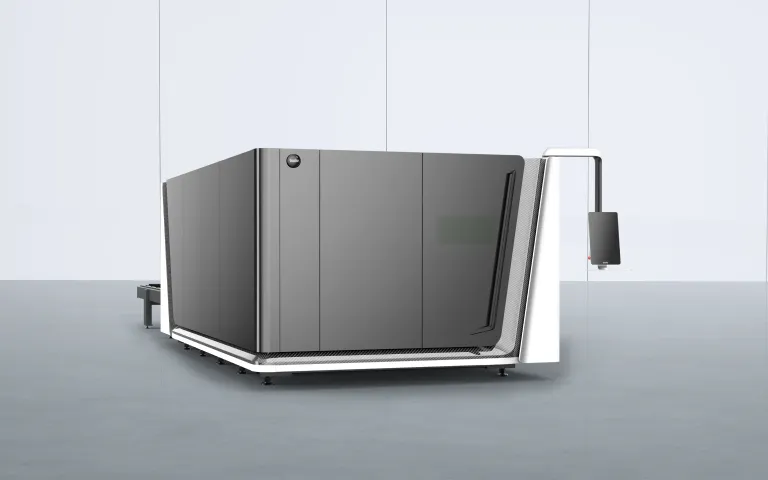
P SERIES
All-around sheet fiber laser metal cutting machine
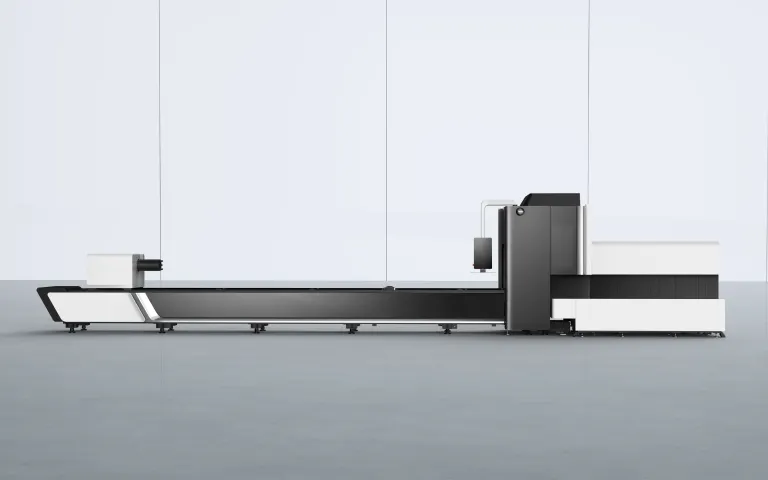
T SERIES
All-around sheet fiber laser metal cutting machine
If you want to equip your factory with our powerful laser cutting machines, please don’t hesitate to contact us. We will provide you with the best quality service and and the most favorable price.